Collapsible Event Bar
One random Saturday night, I was scrolling through Pinterest and came across a foldable bar design.
Right away,I knew I had to build one.
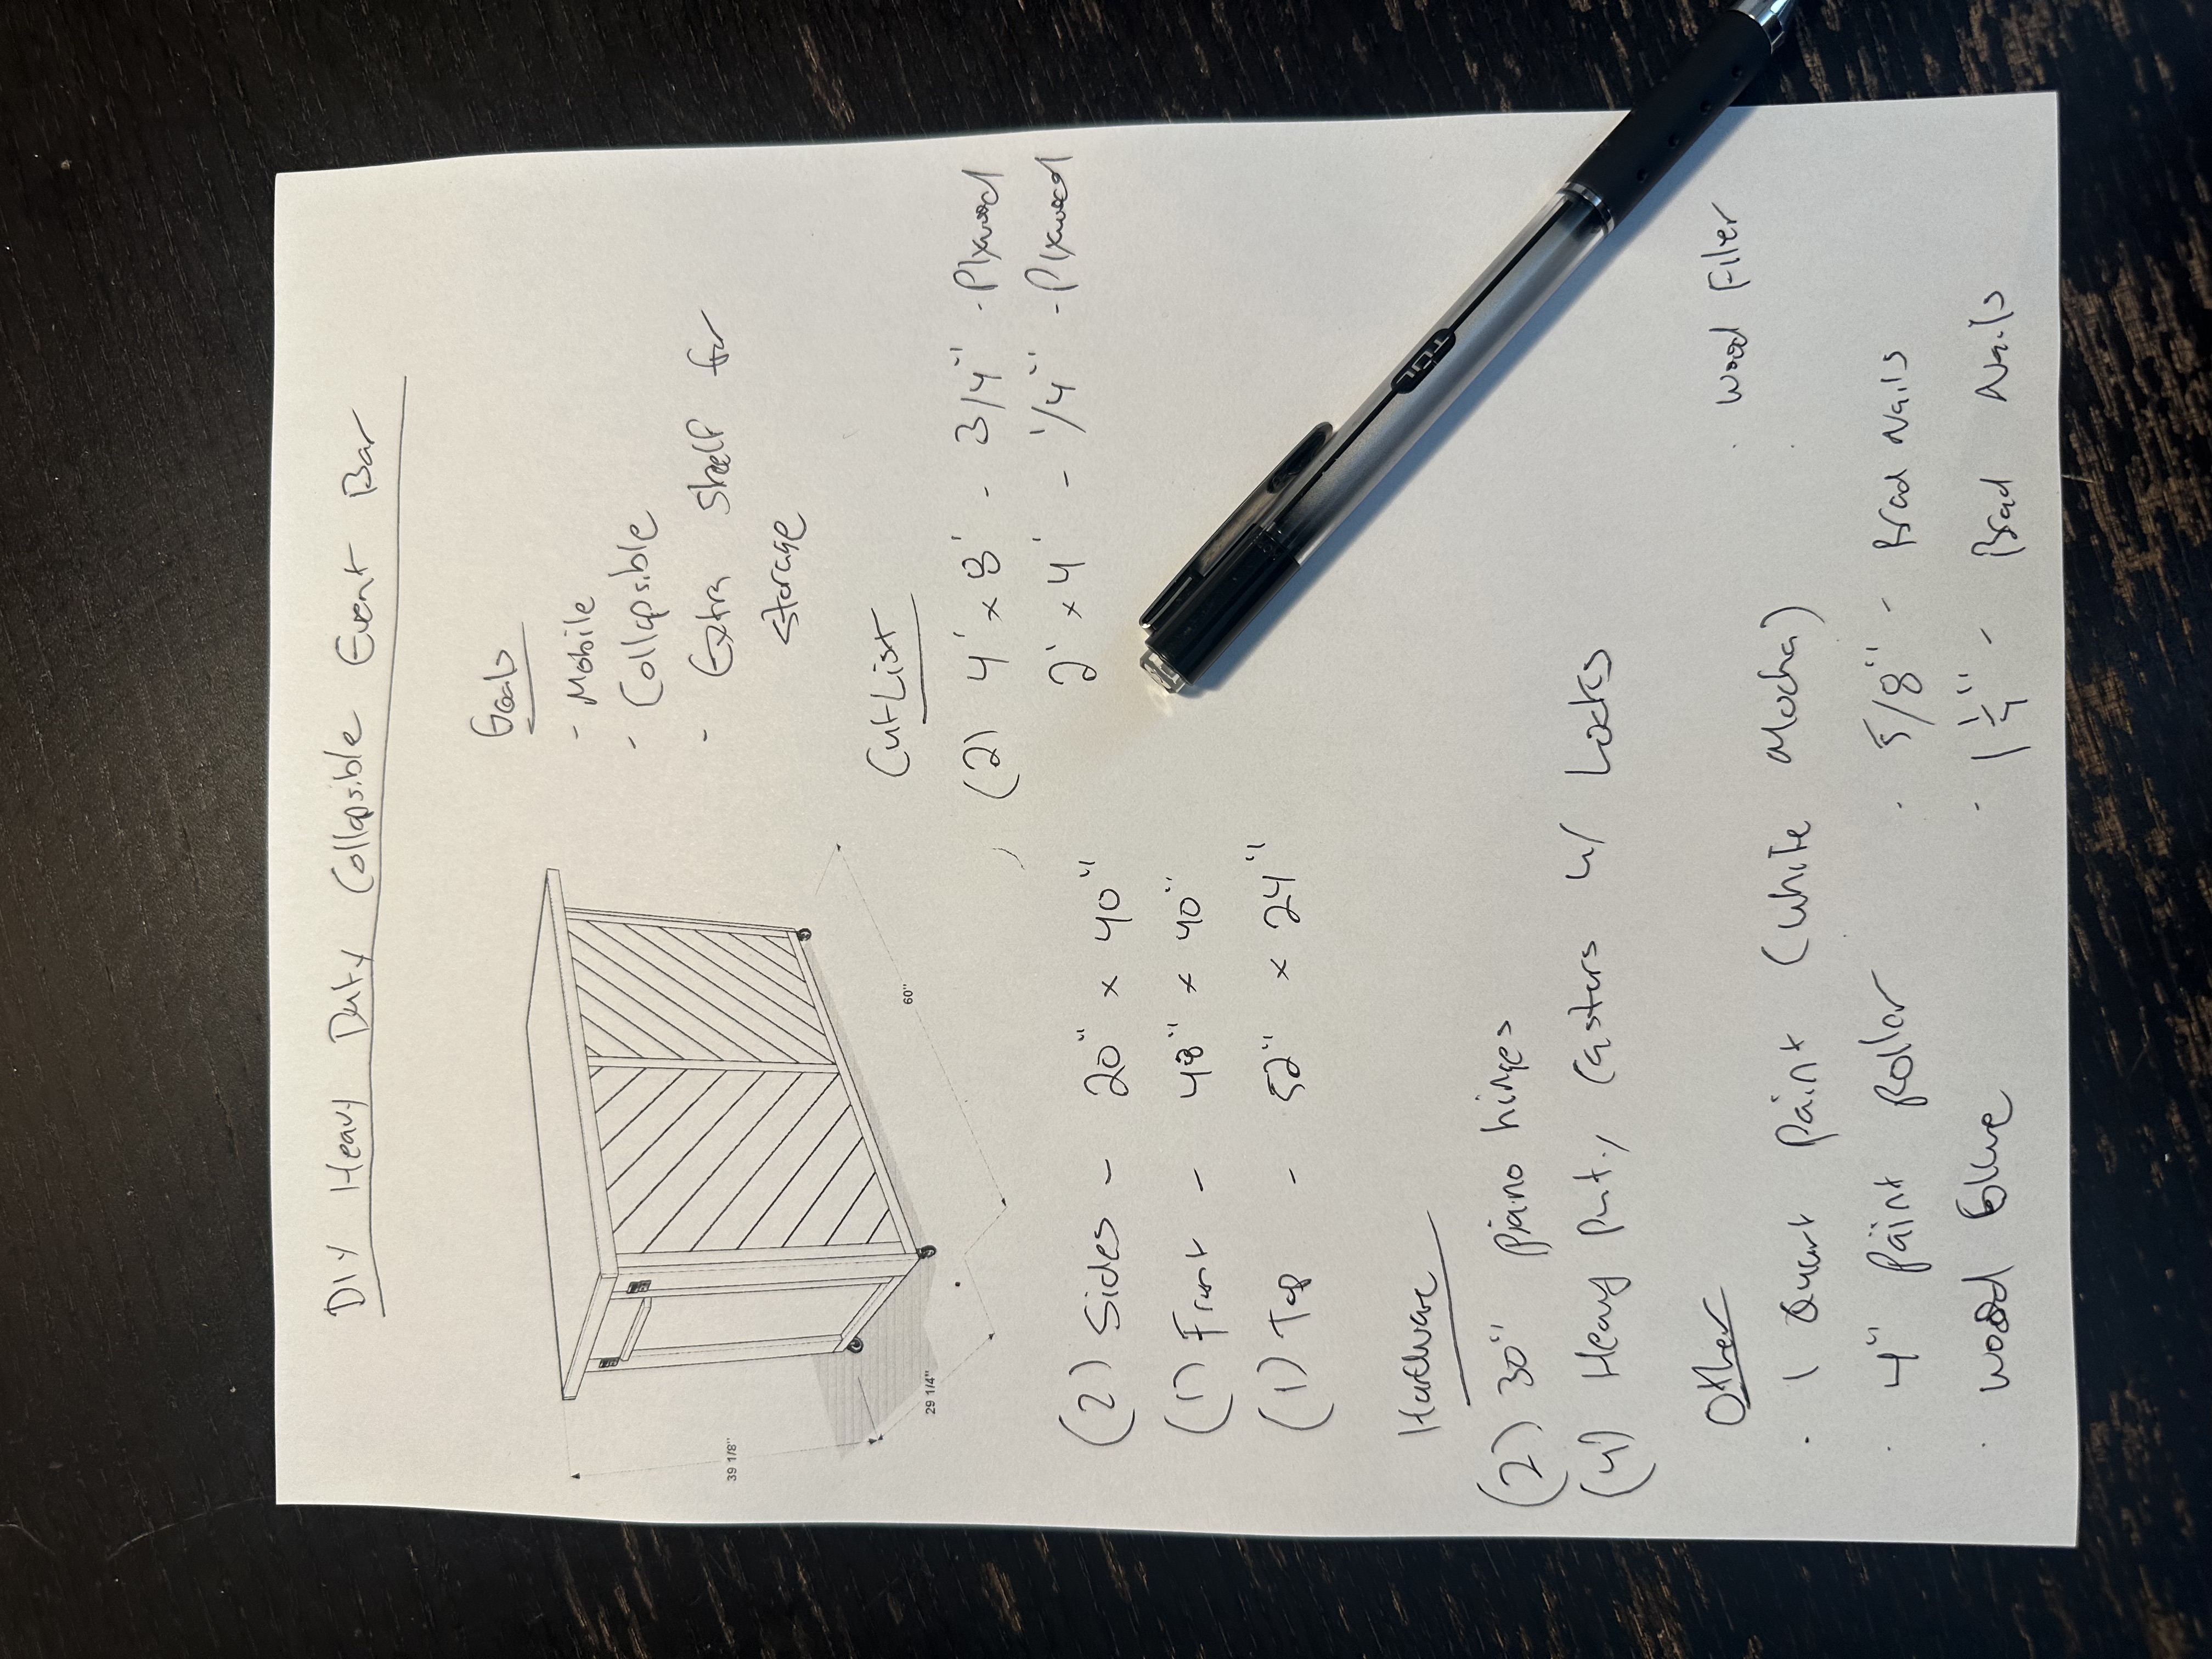
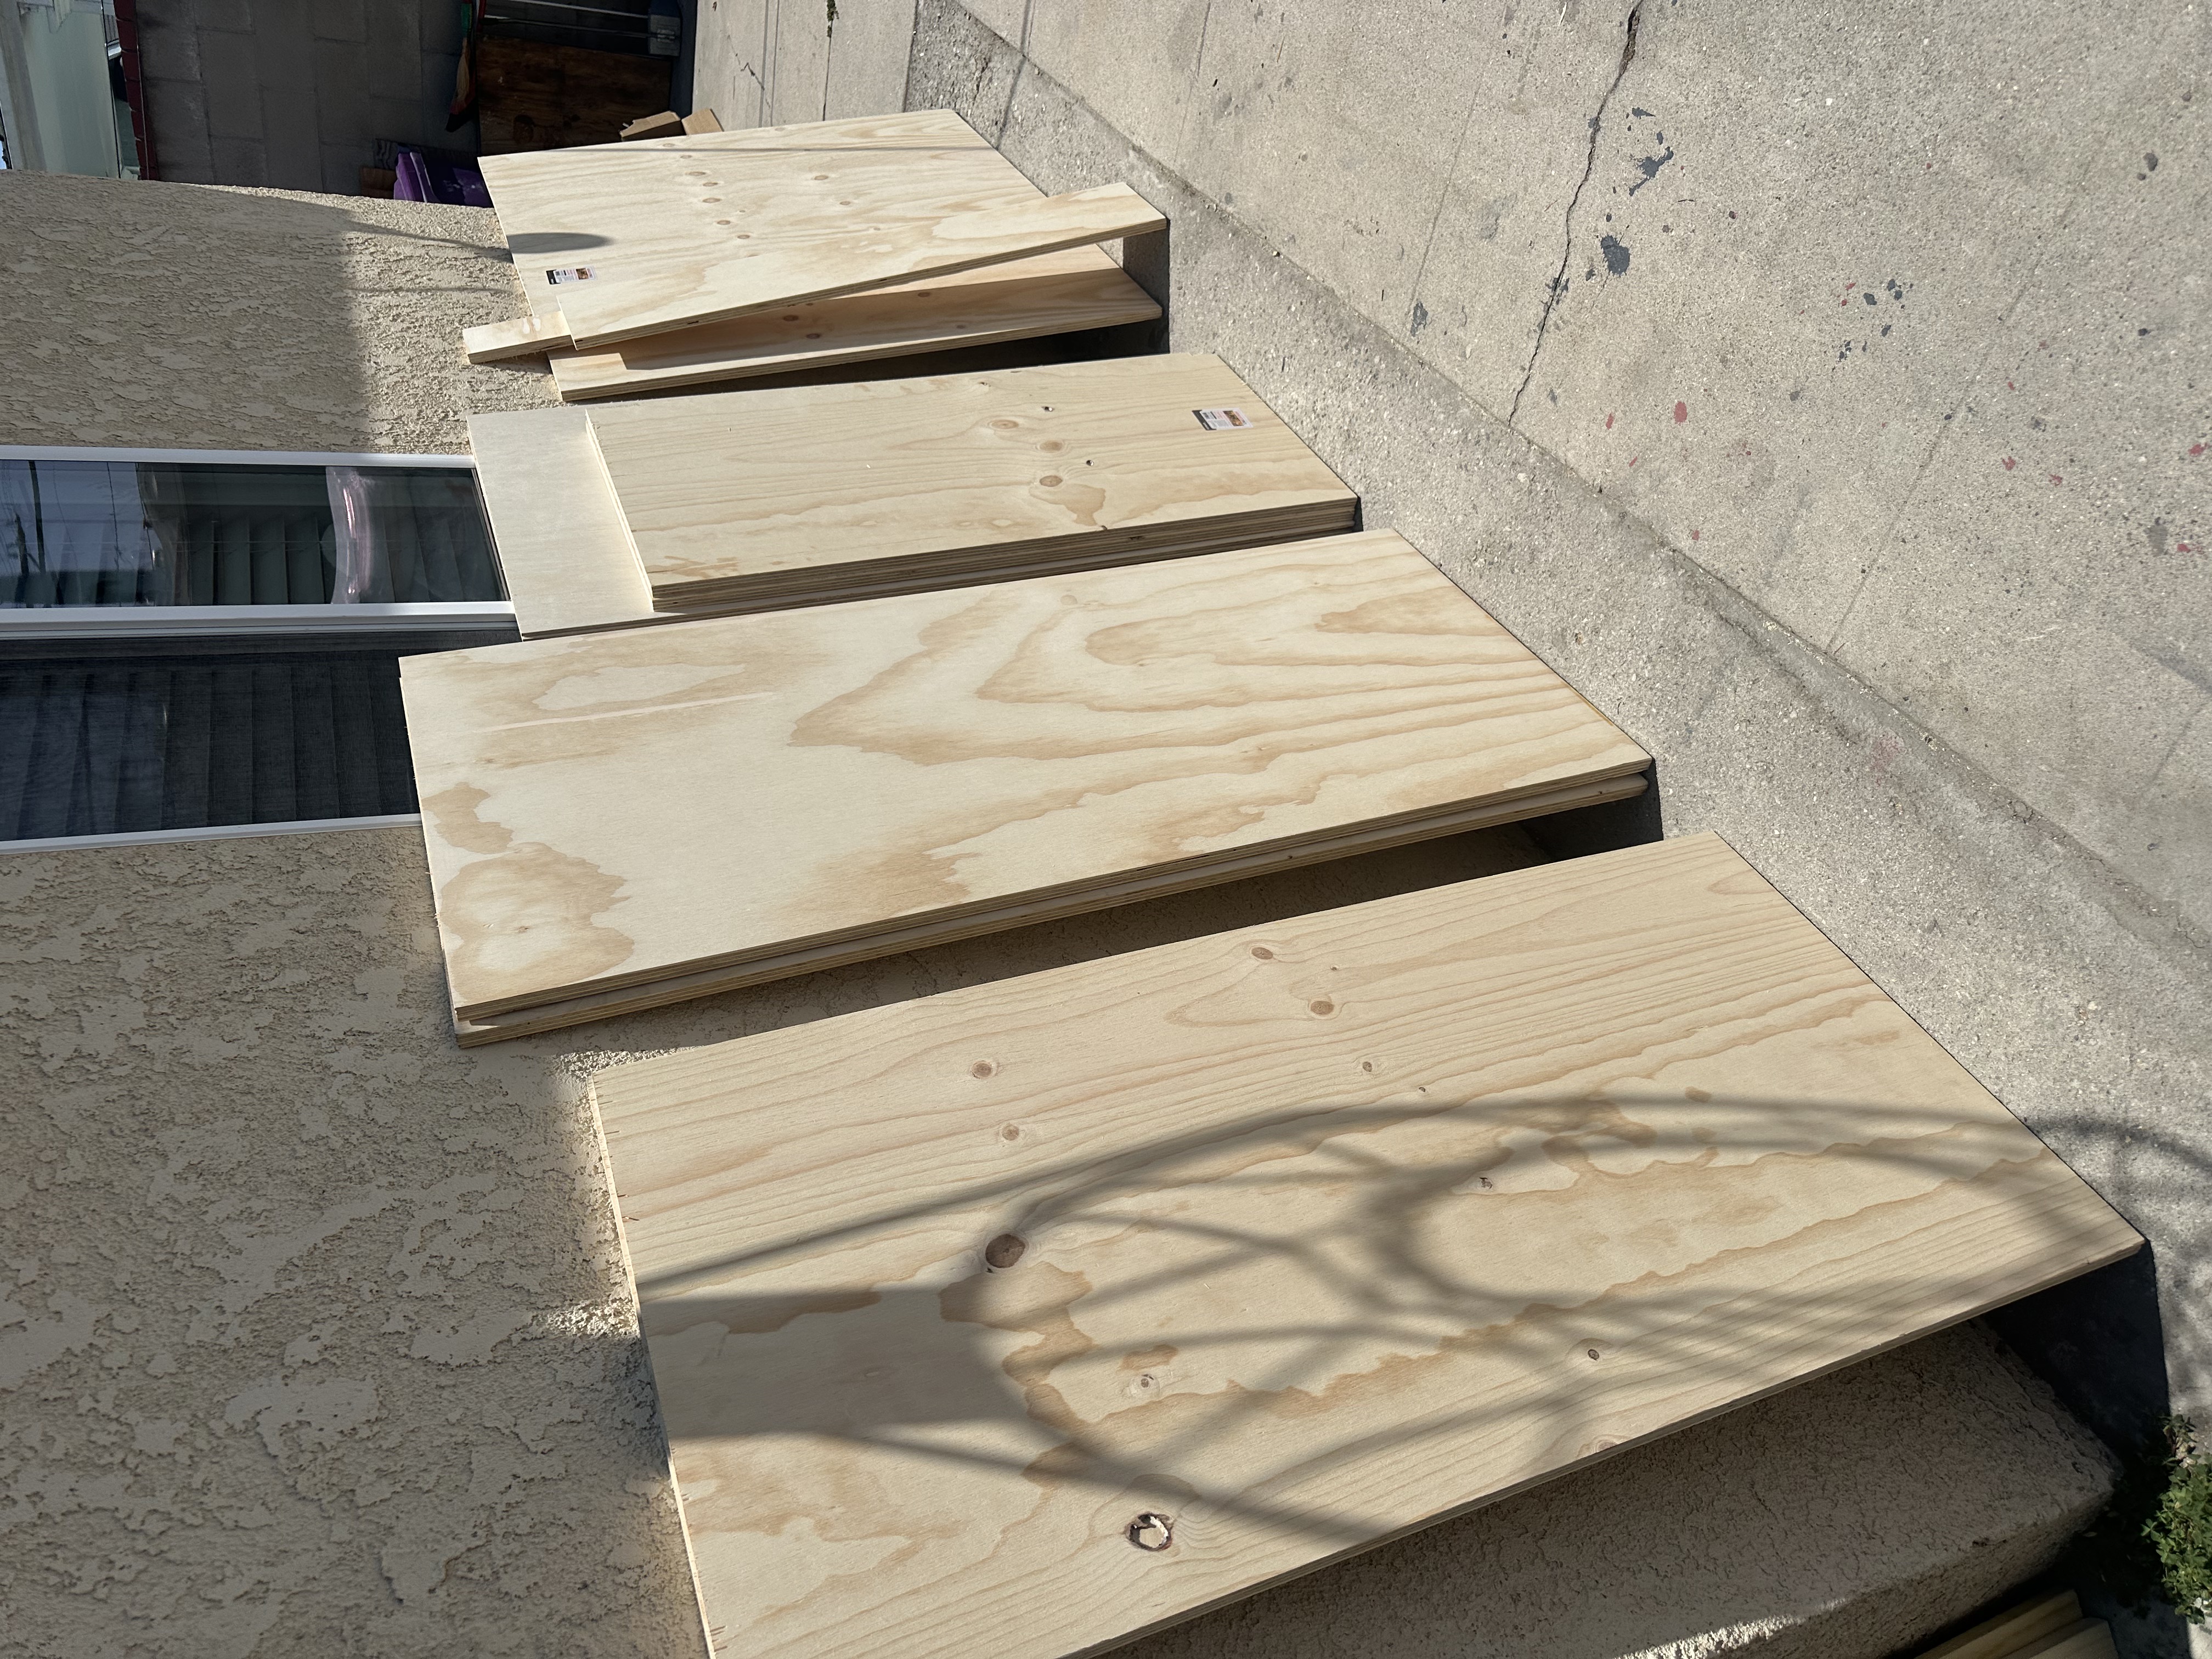
I grabbed a pen and paper, sketched out some rough plans, made a cut list, and by the next morning I was at Home Depot picking up two full sheets of ¾” plywood and the hardware I thought I’d need.
The goal from the start was simple:
I wanted this build to be functional, portable, and easy to move, while still looking clean enough to keep inside the house.

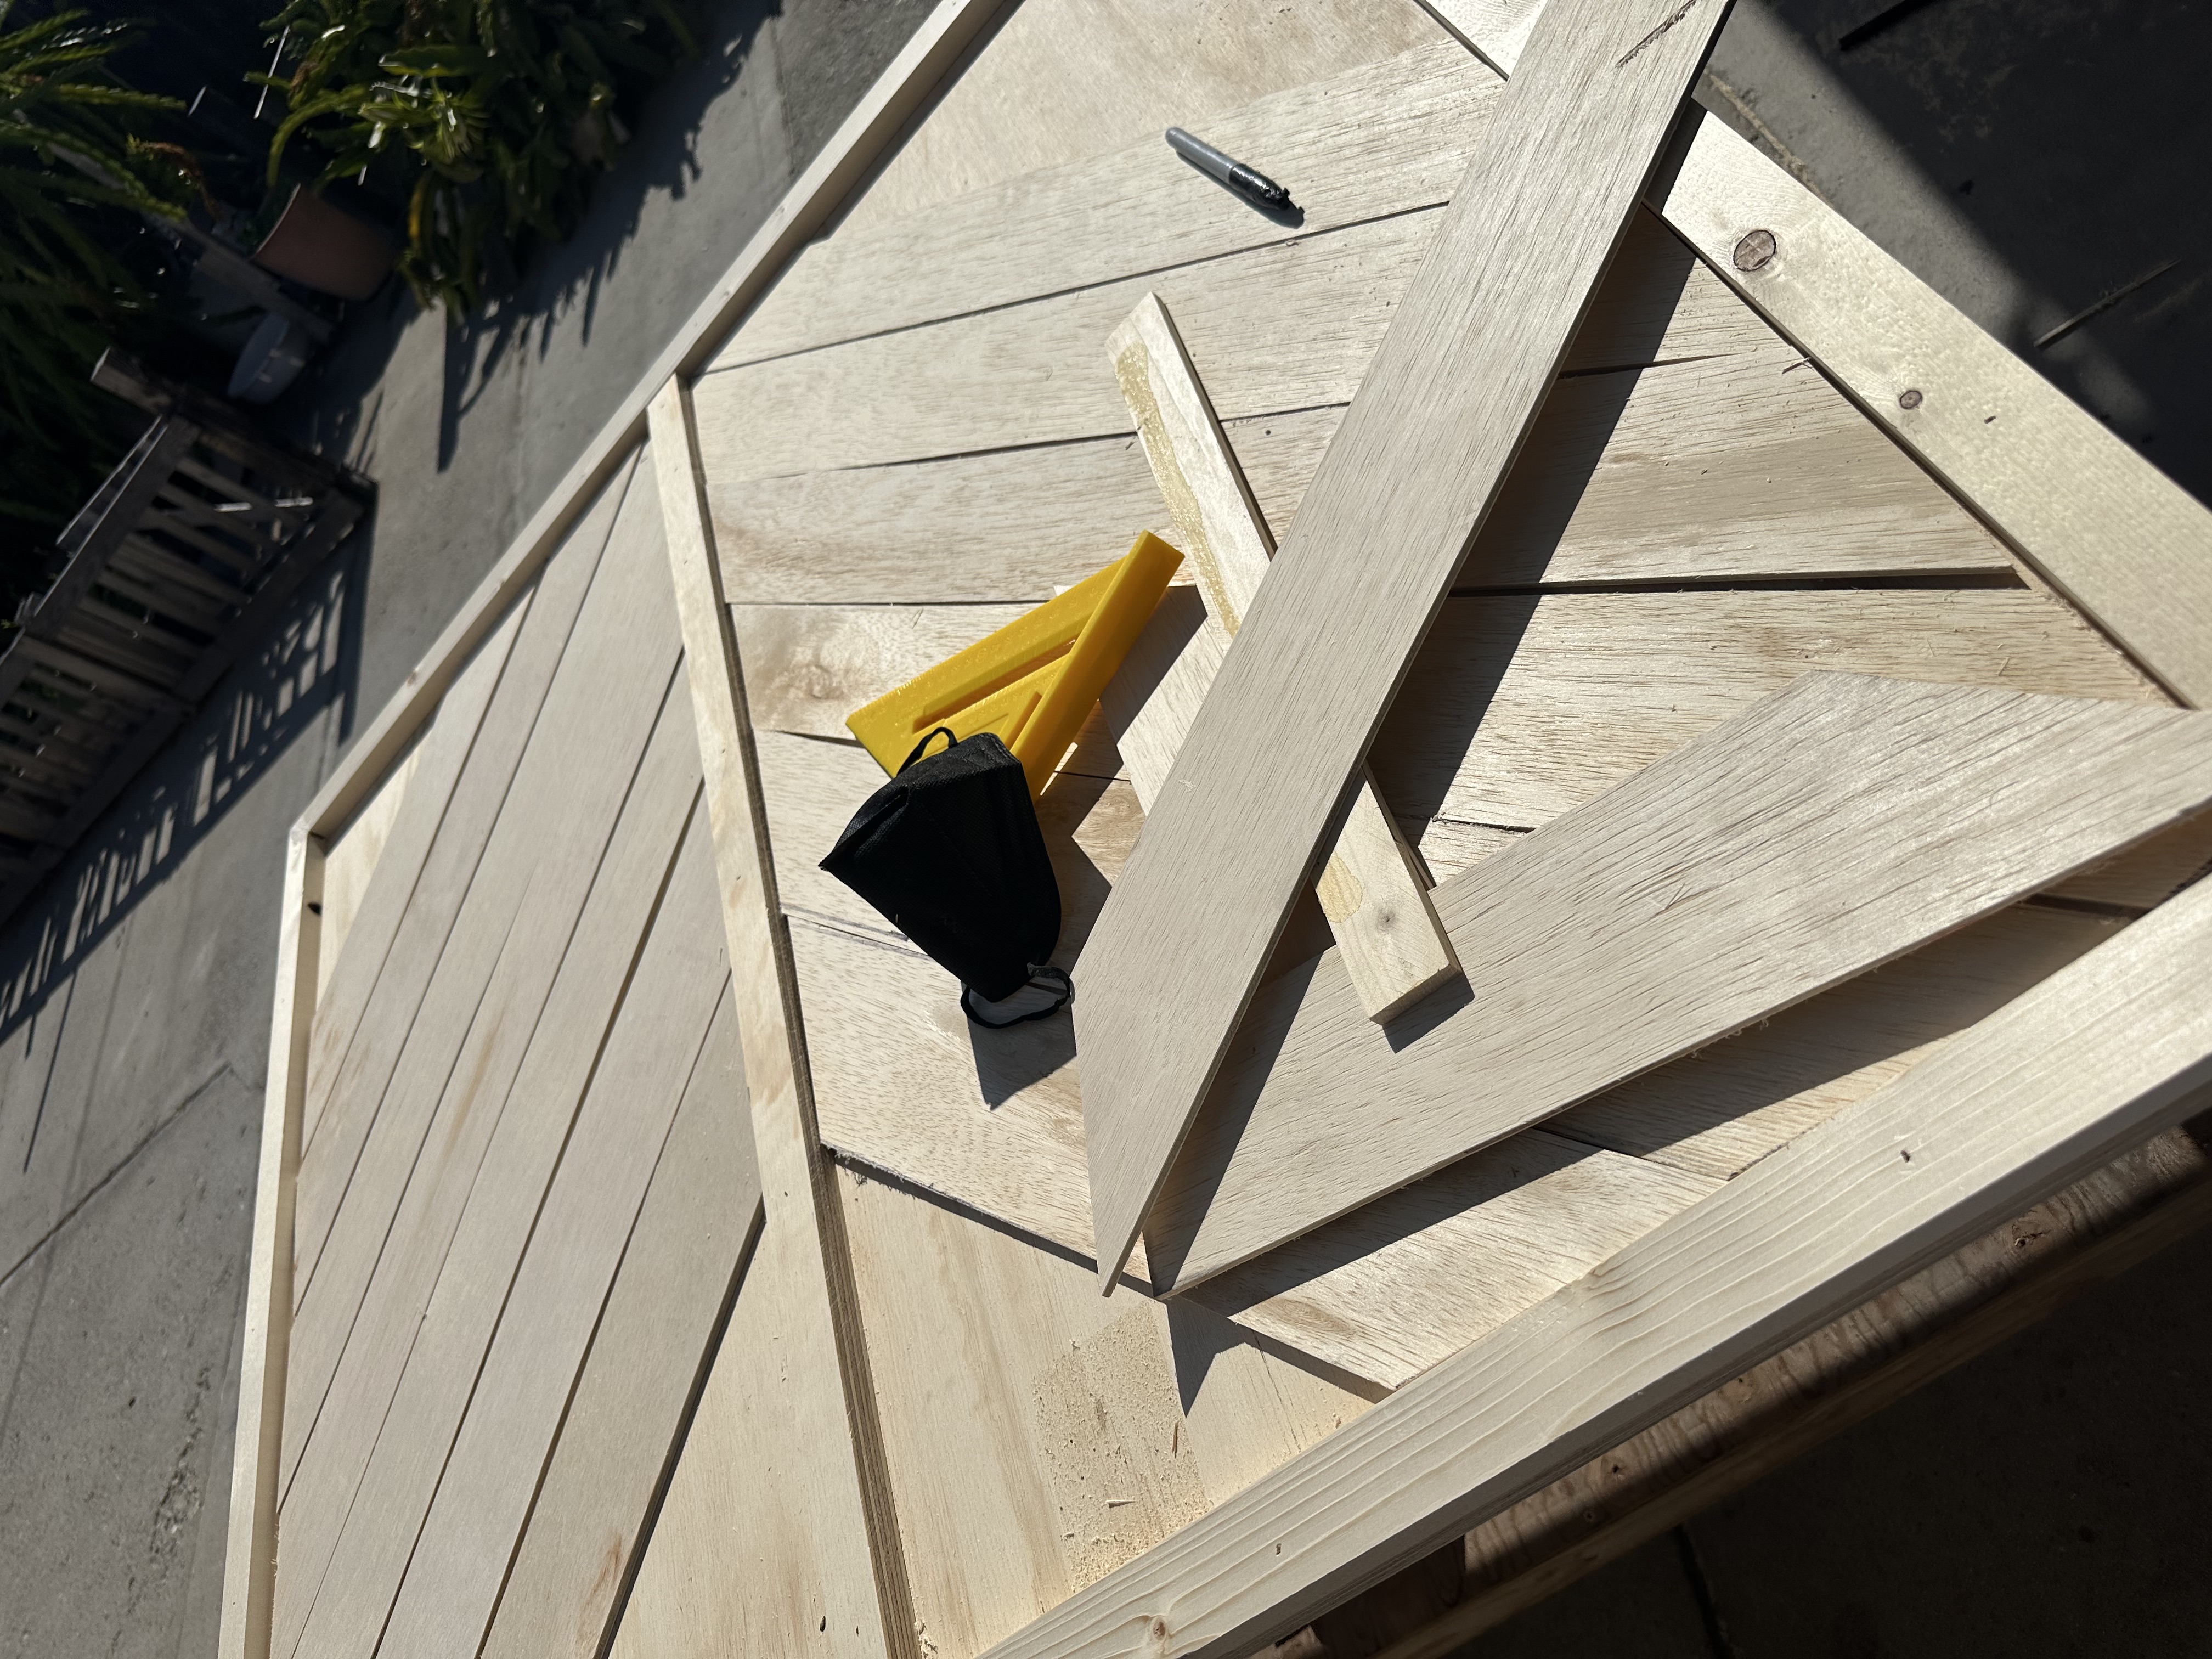
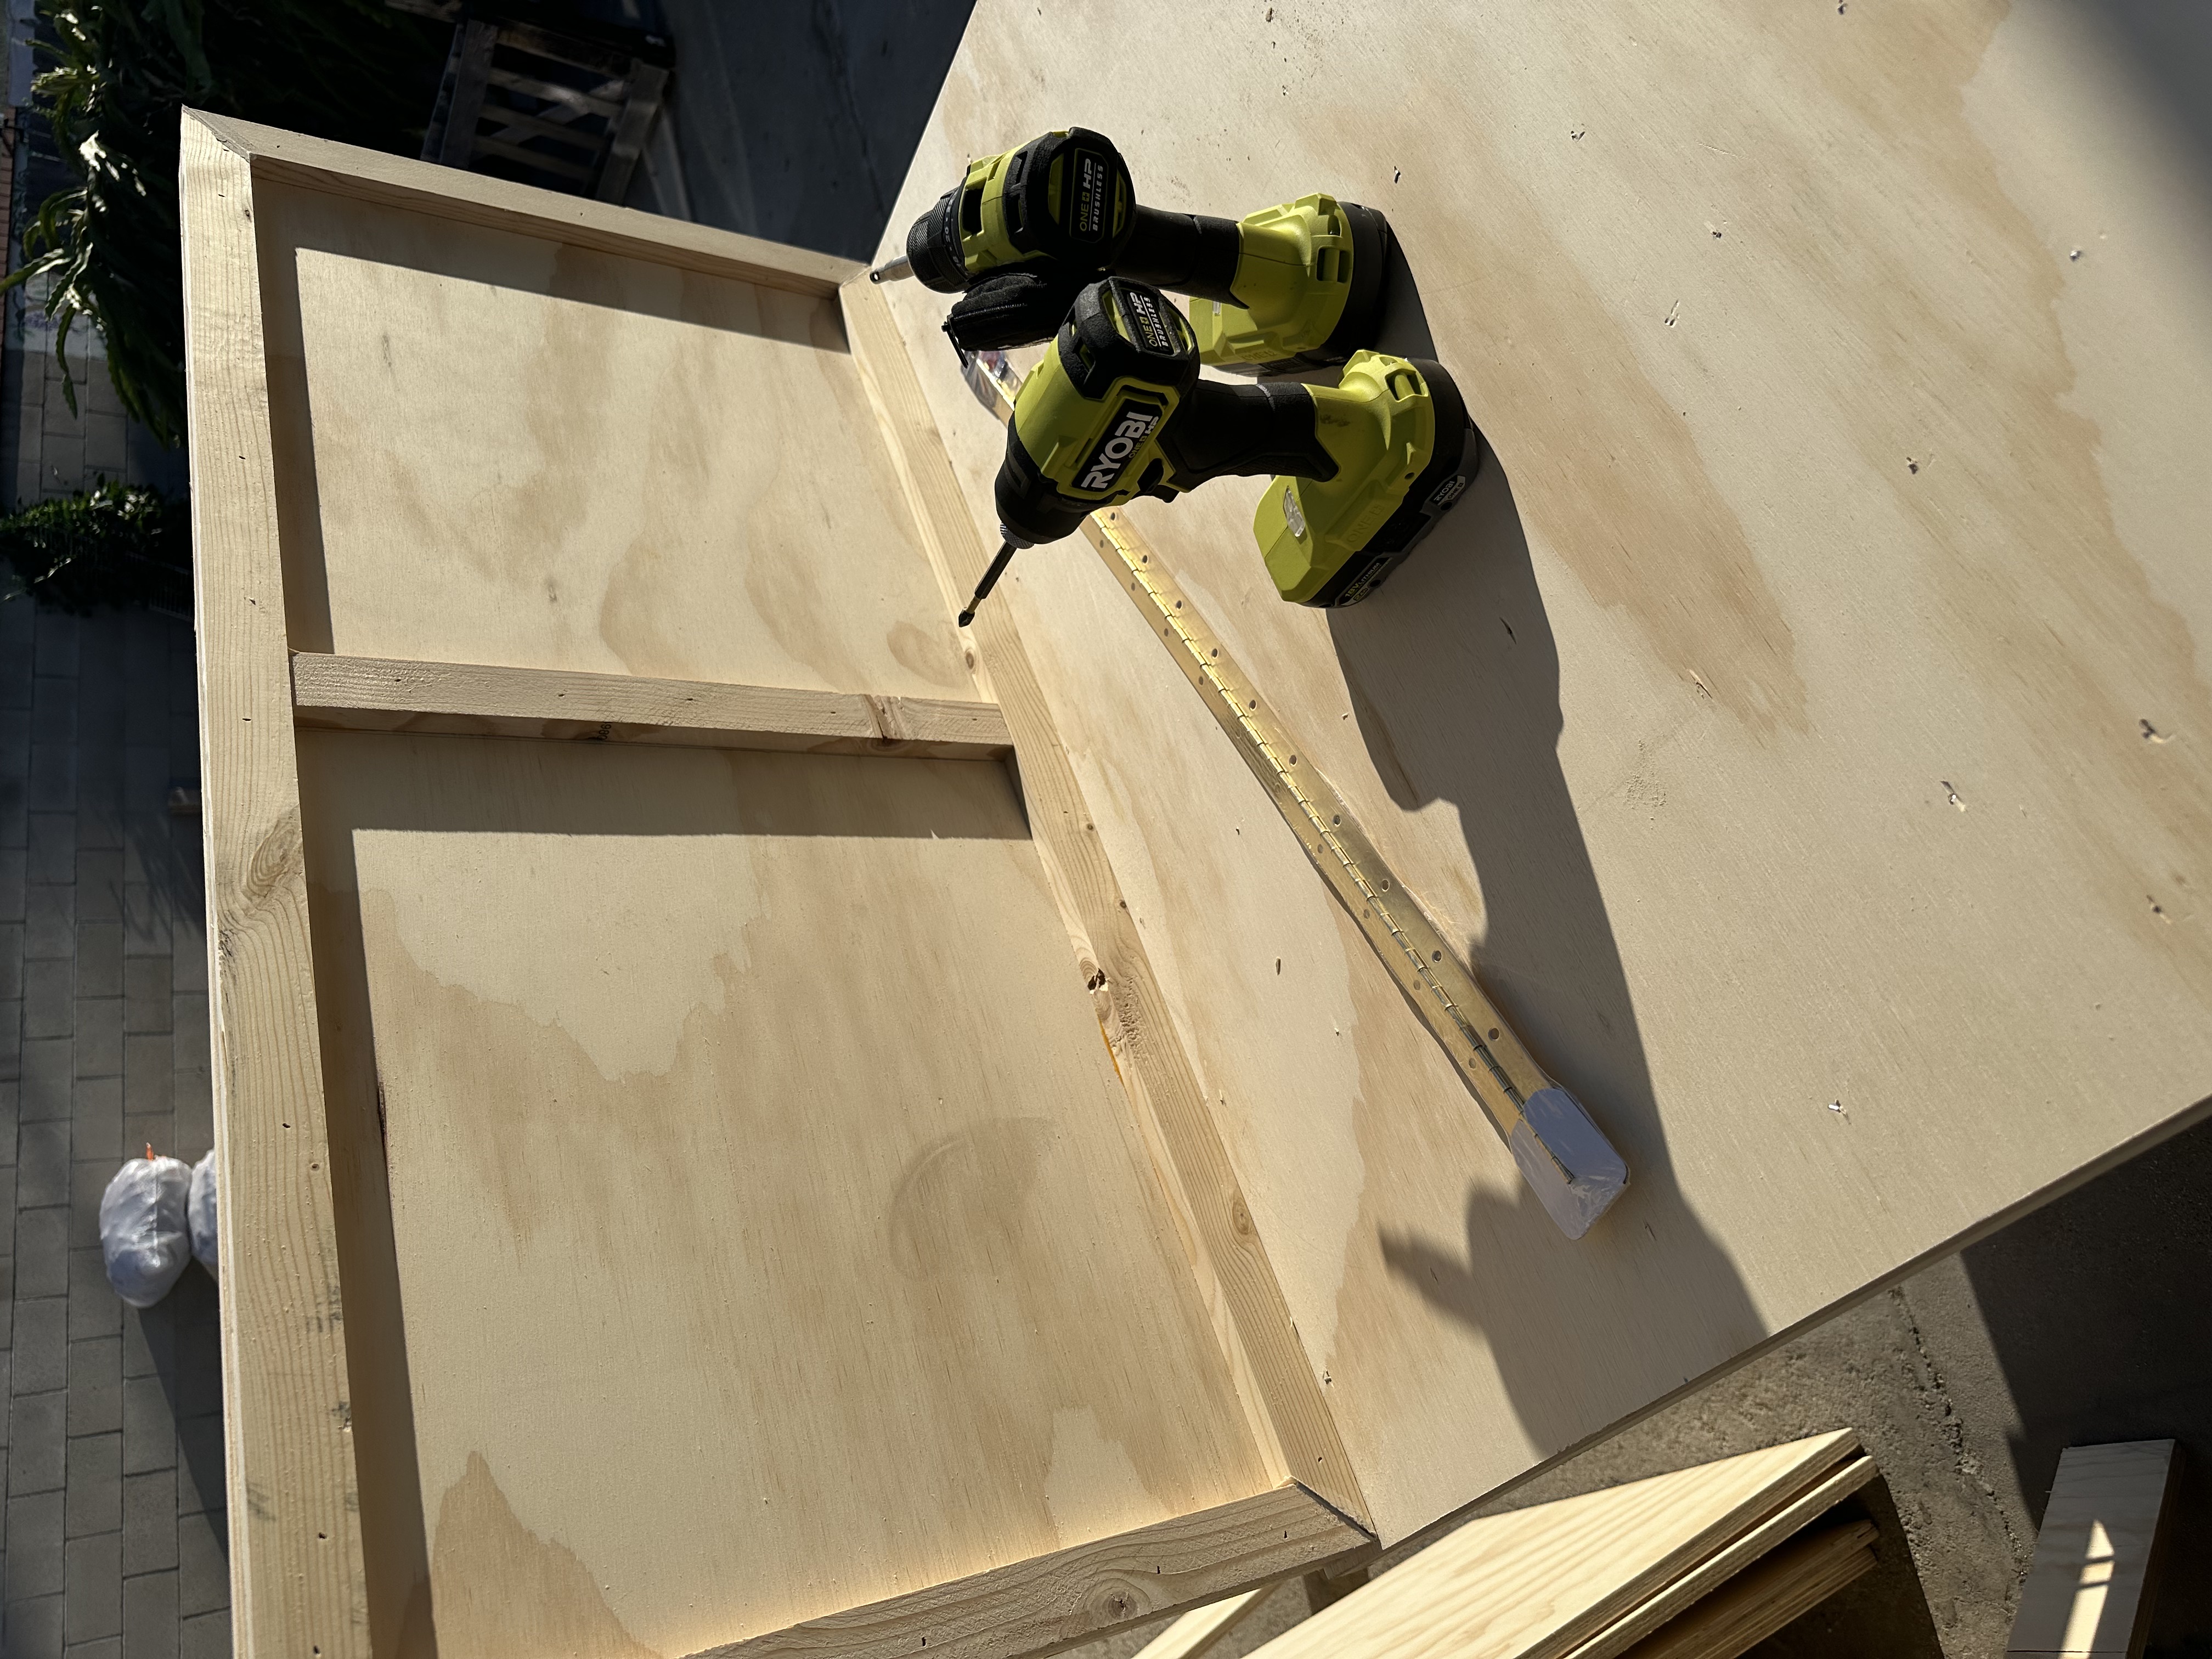
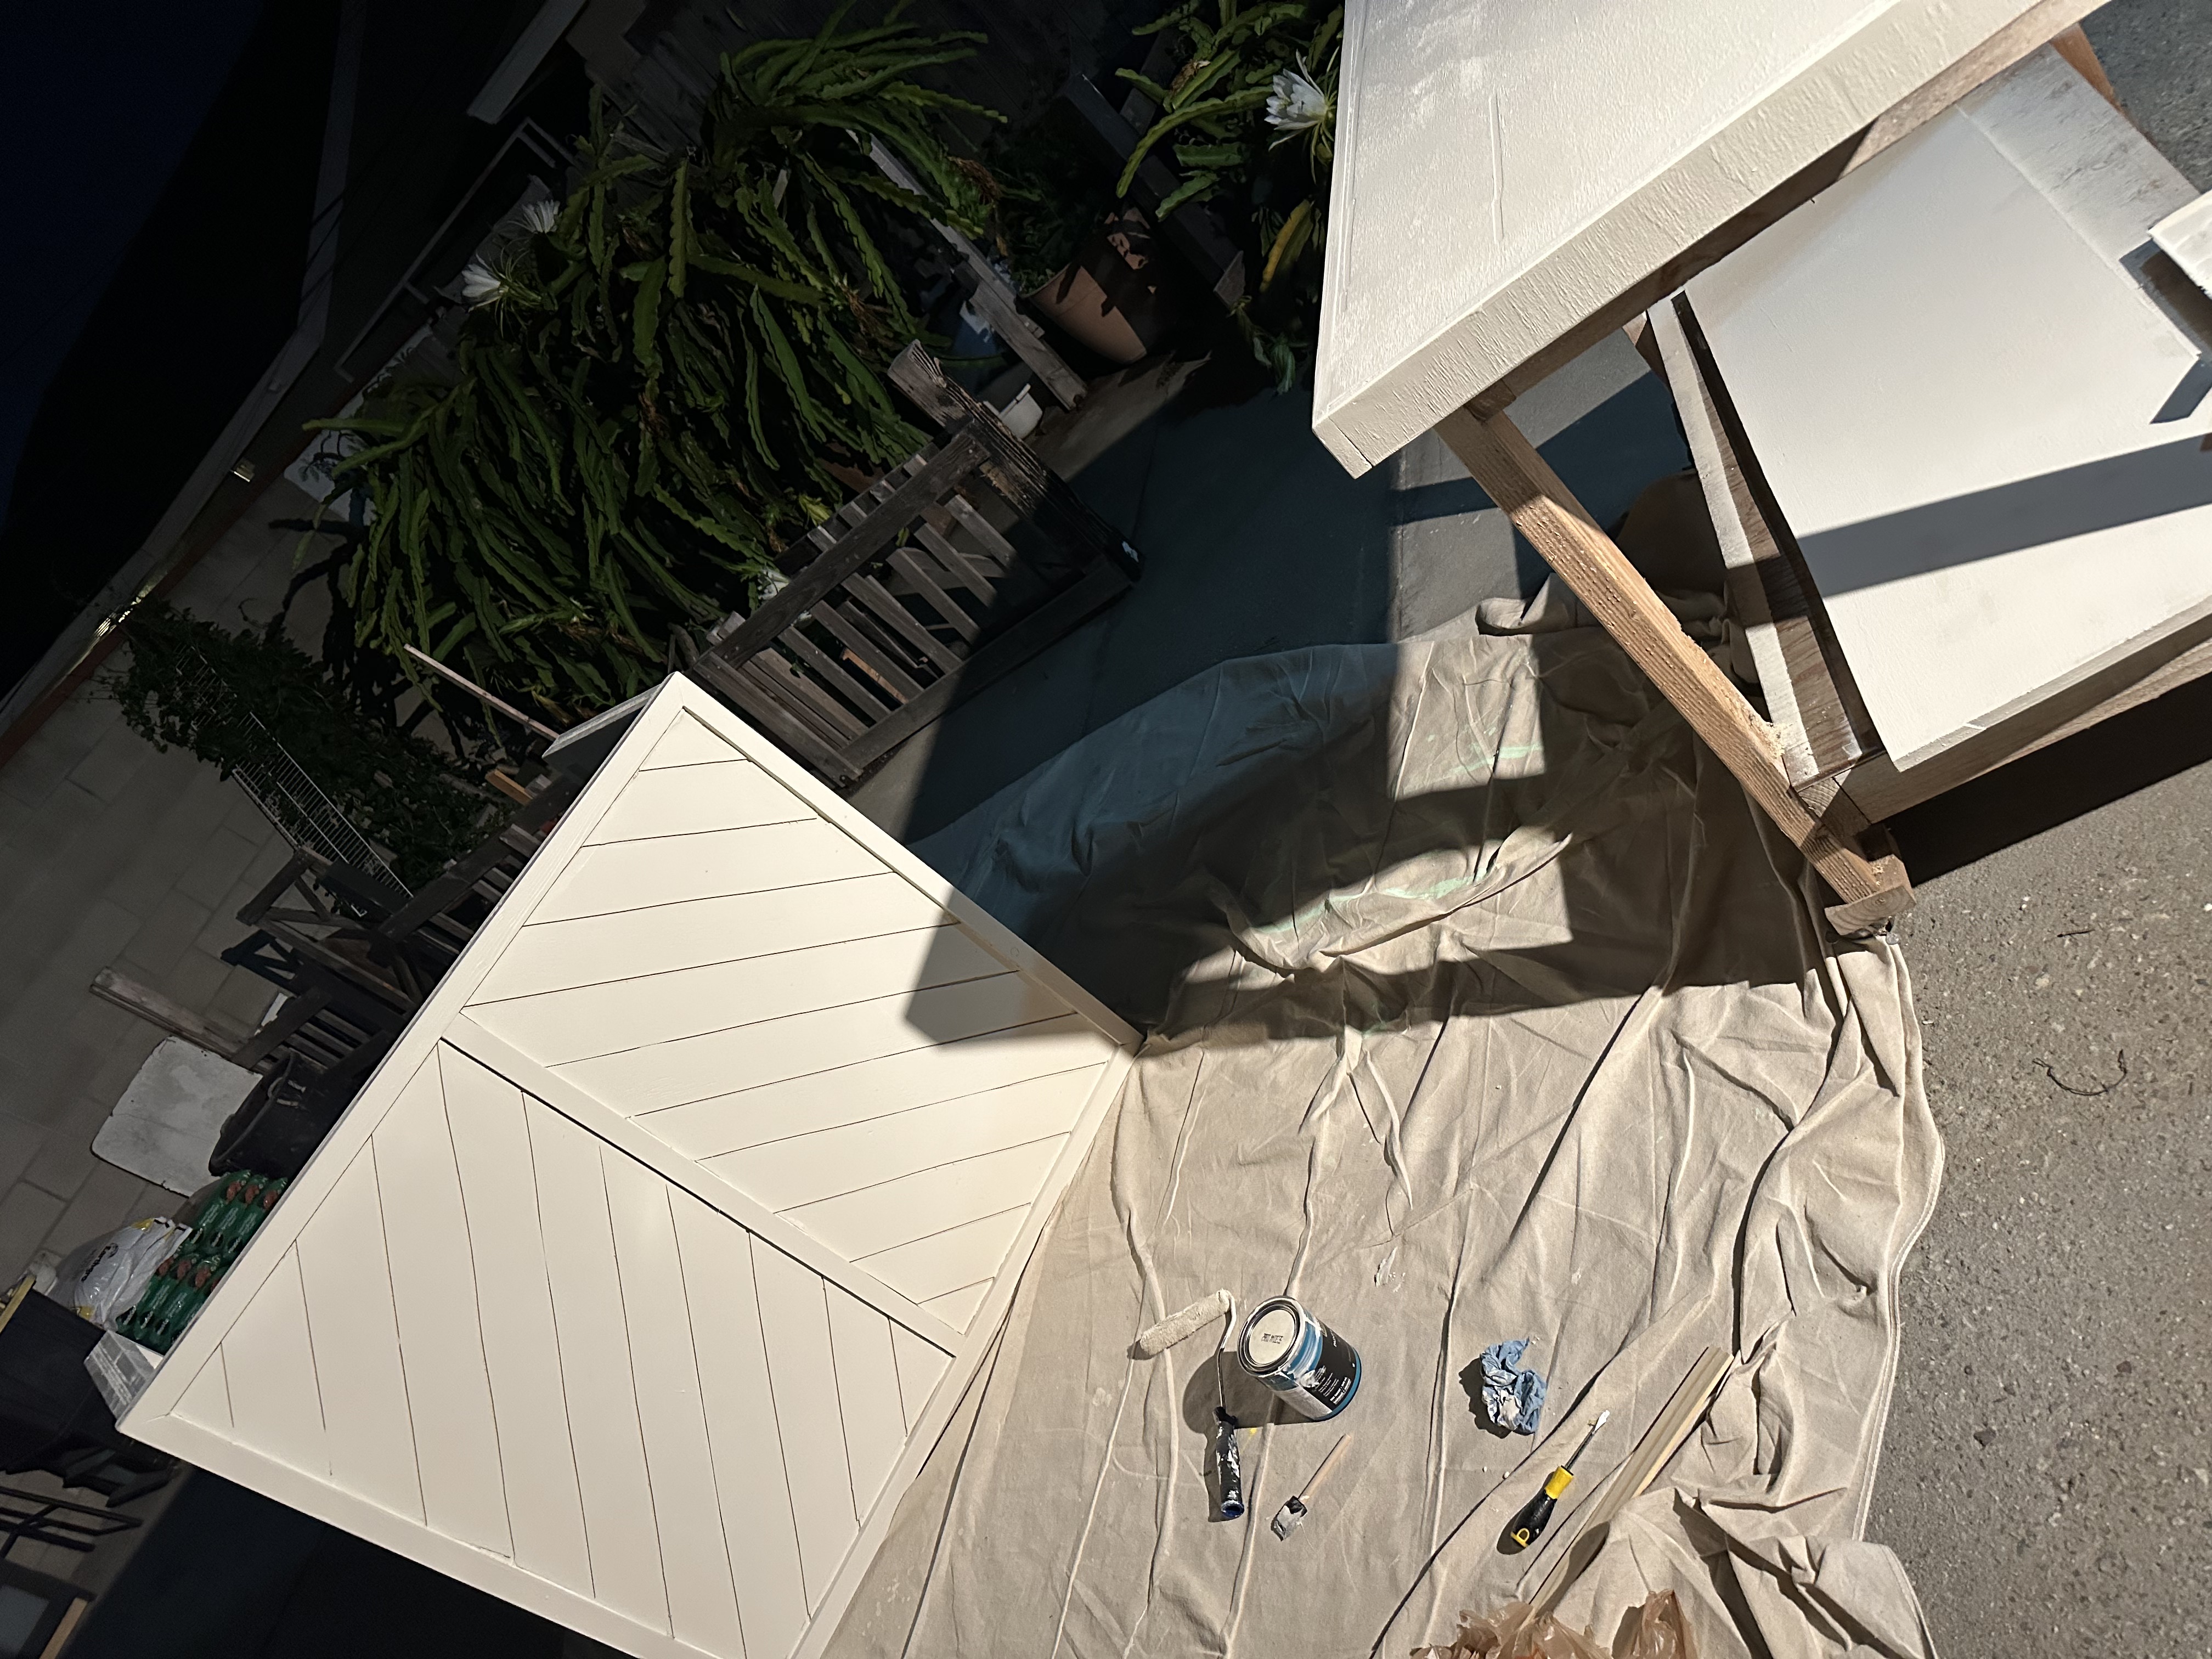
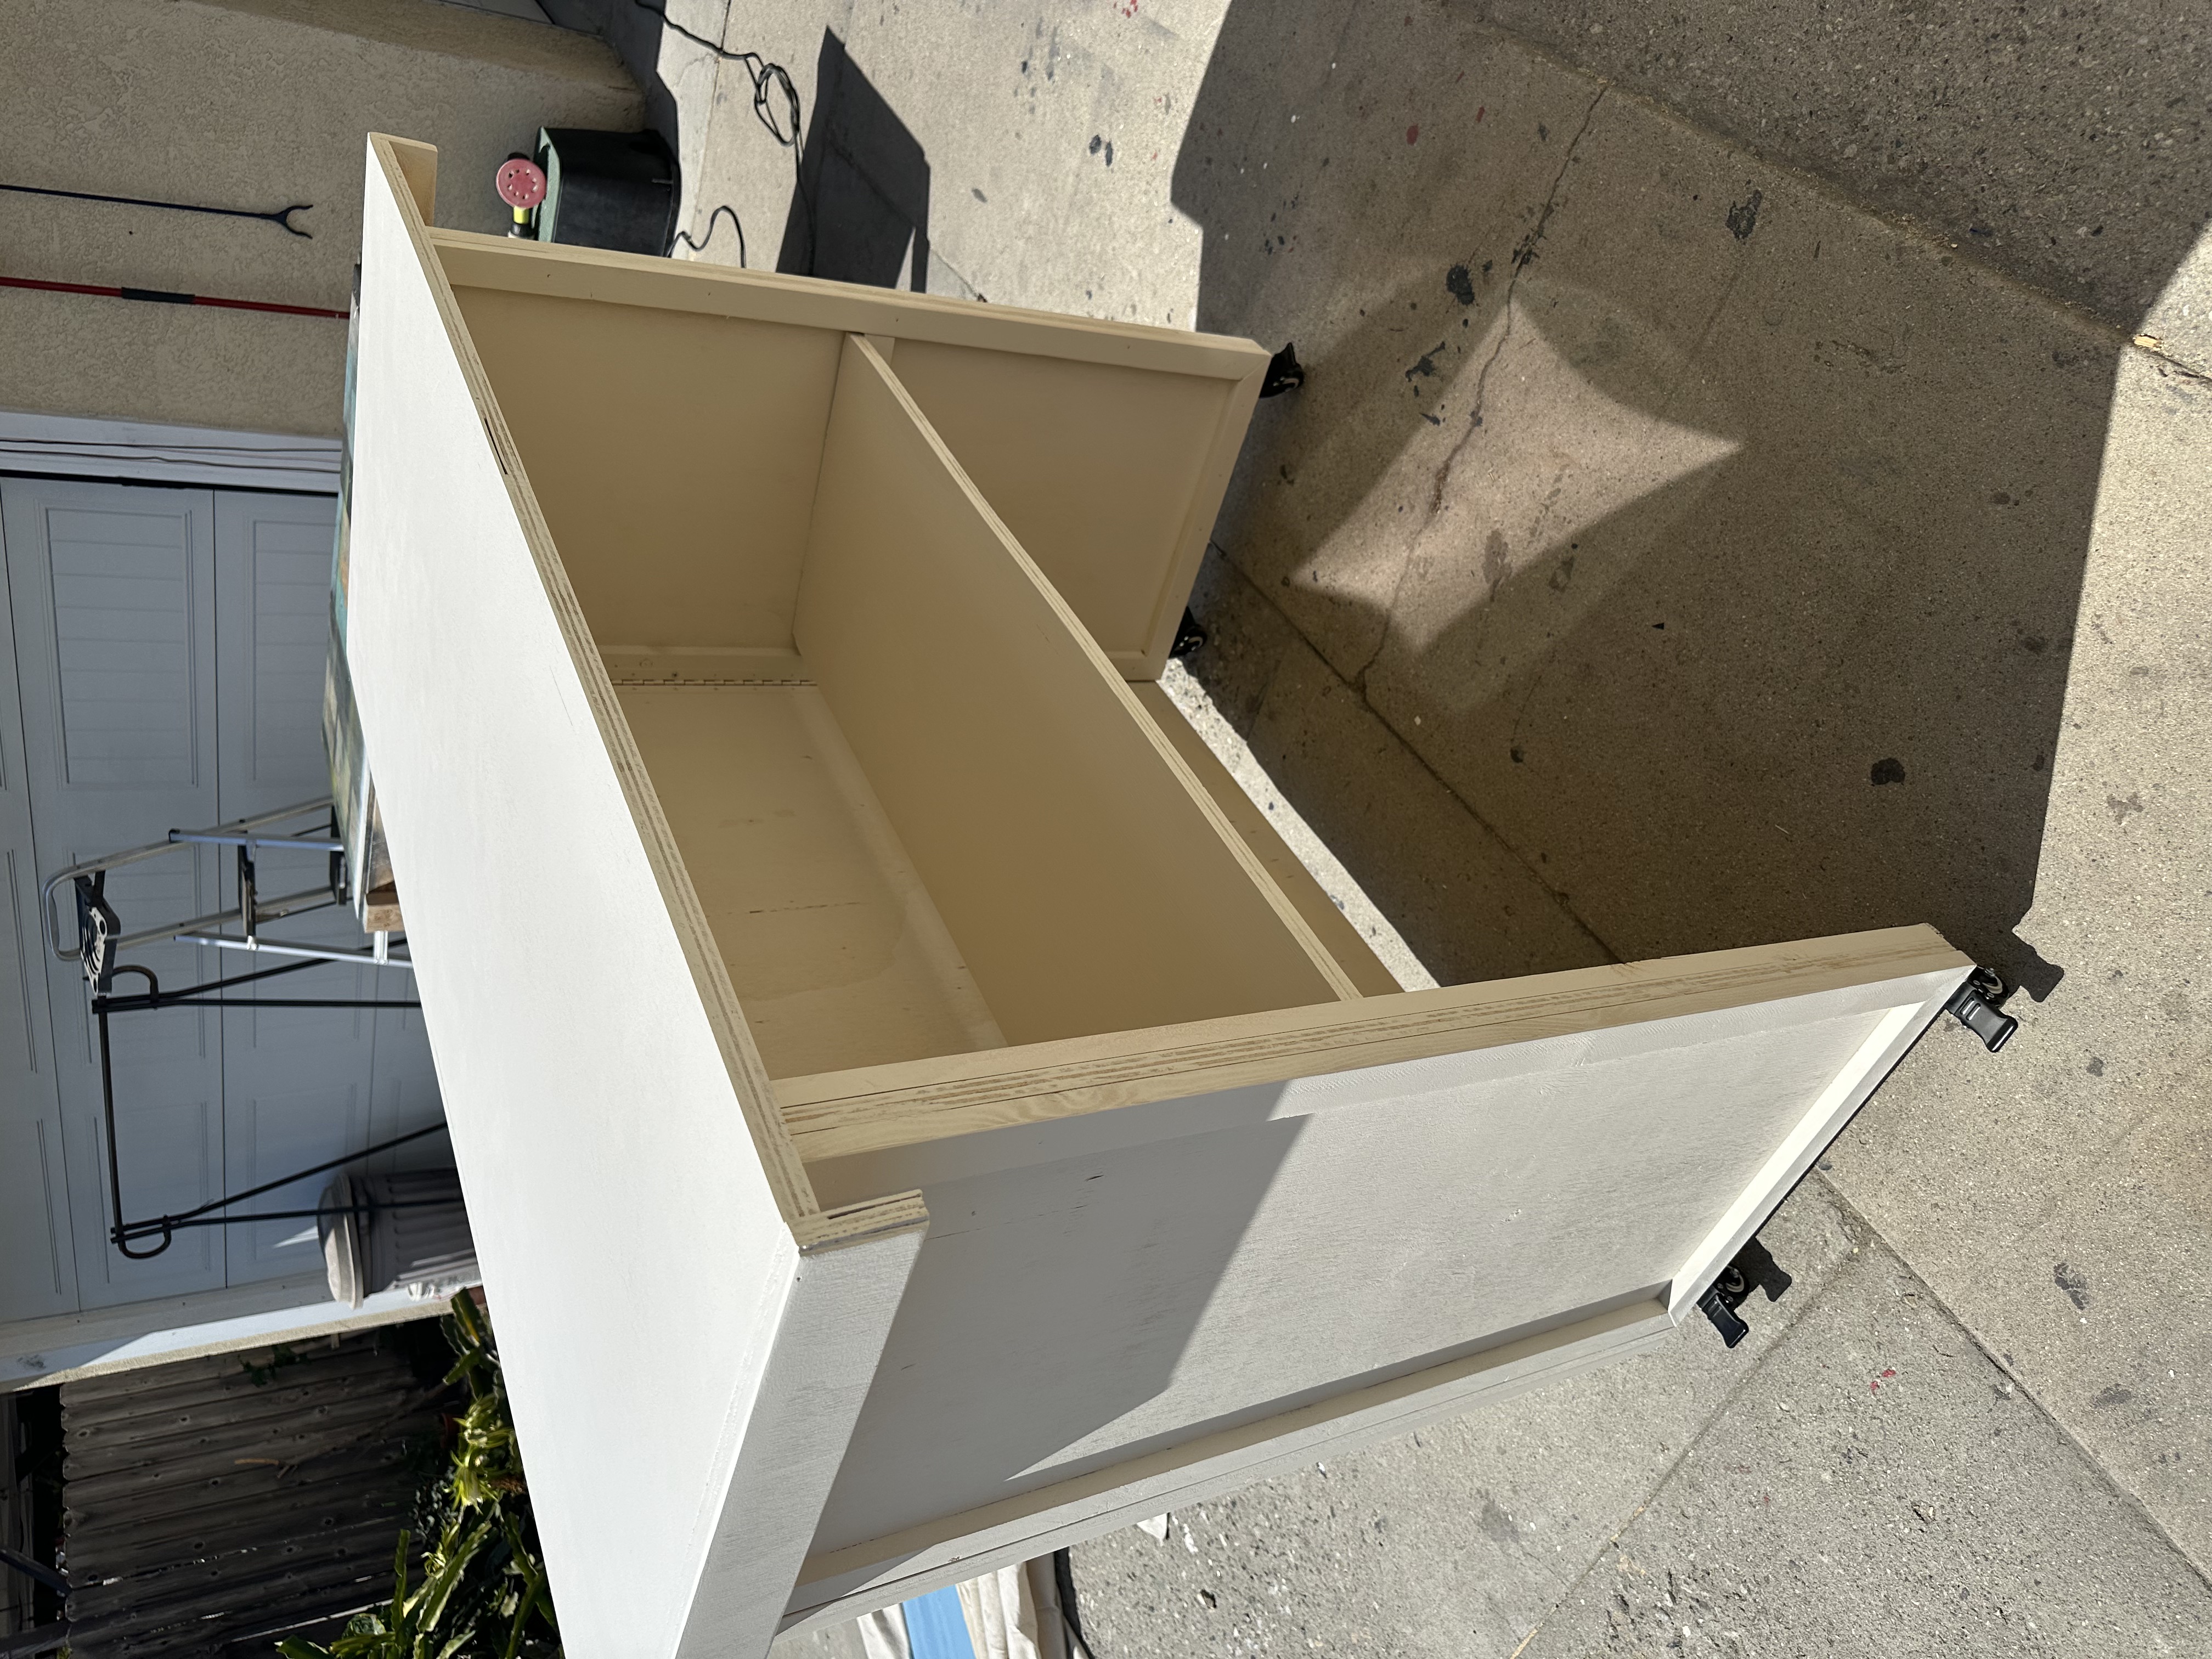
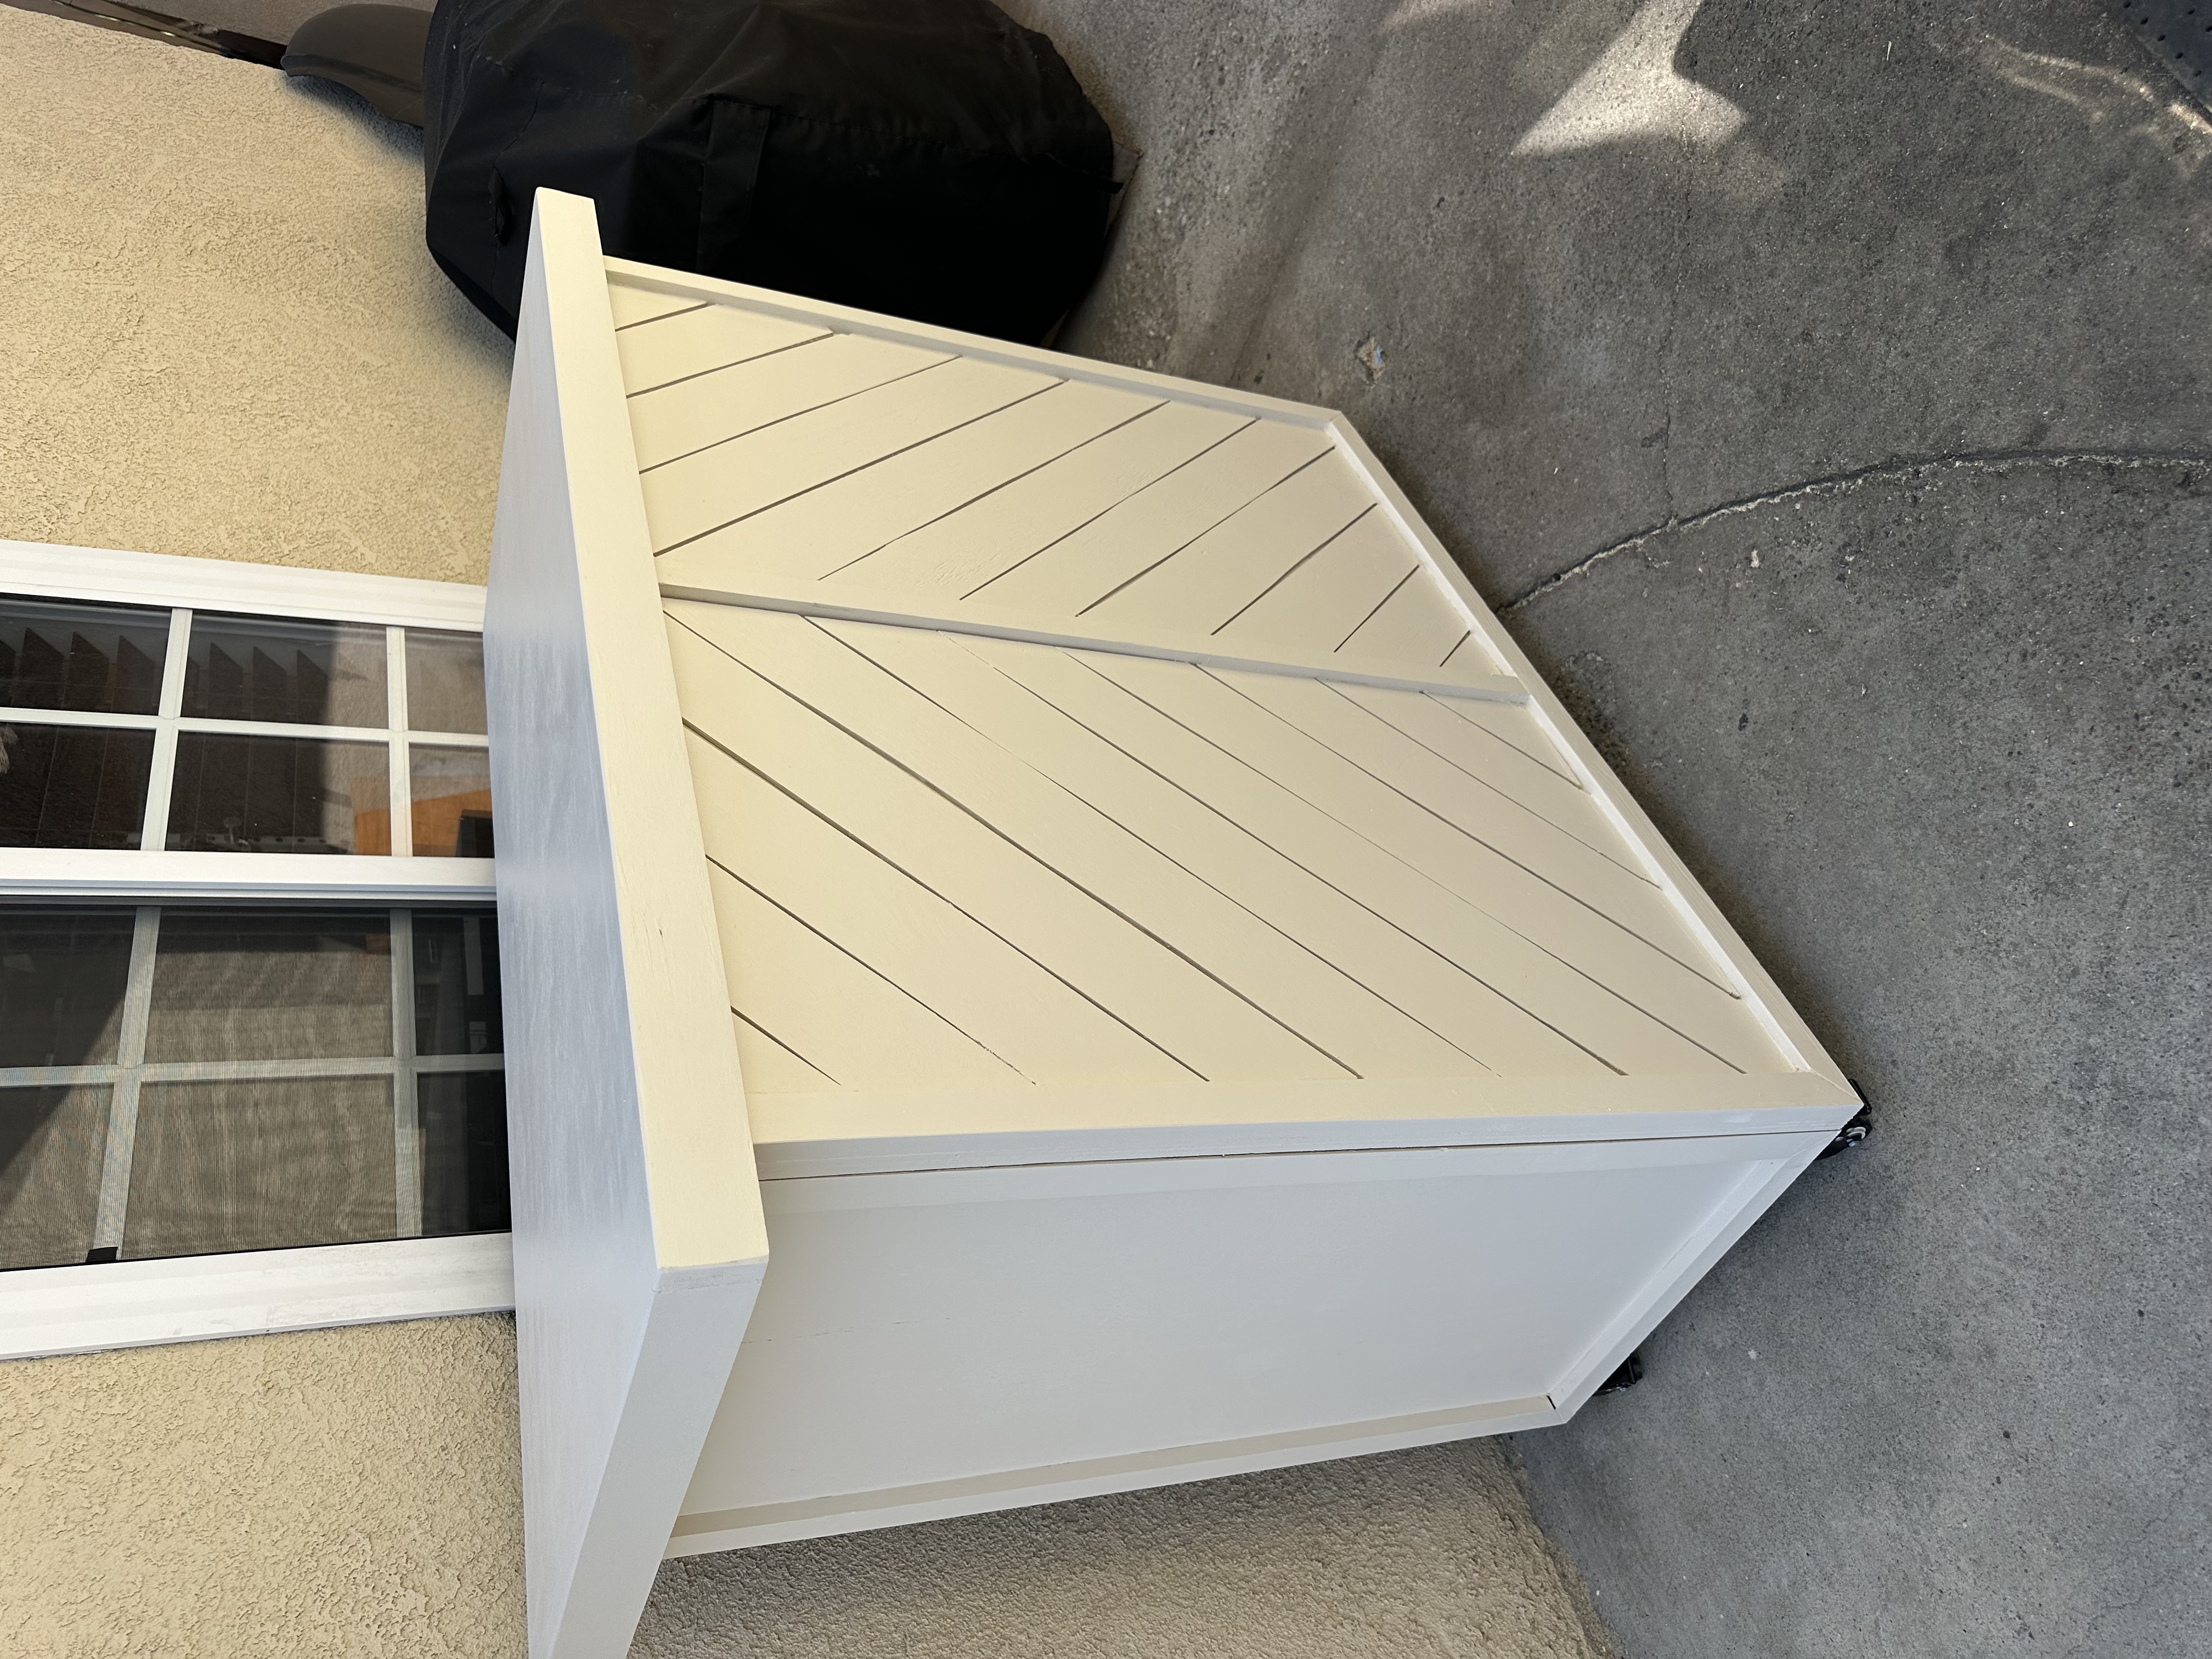
Once I got home, I broke everything down into panels and framed each section individually. Before assembling it all together, I decided to push myself a bit and experiment with the design. I cut ¼” plywood pieces at 45° angles and freestyled a pattern instead of keeping everything flat and plain.
That part alone took about two hours ,mostly measuring, second-guessing, and re-cutting but it ended up being one of my favorite parts of the build.
After everything was assembled, I went into what felt like a never-ending sanding session.
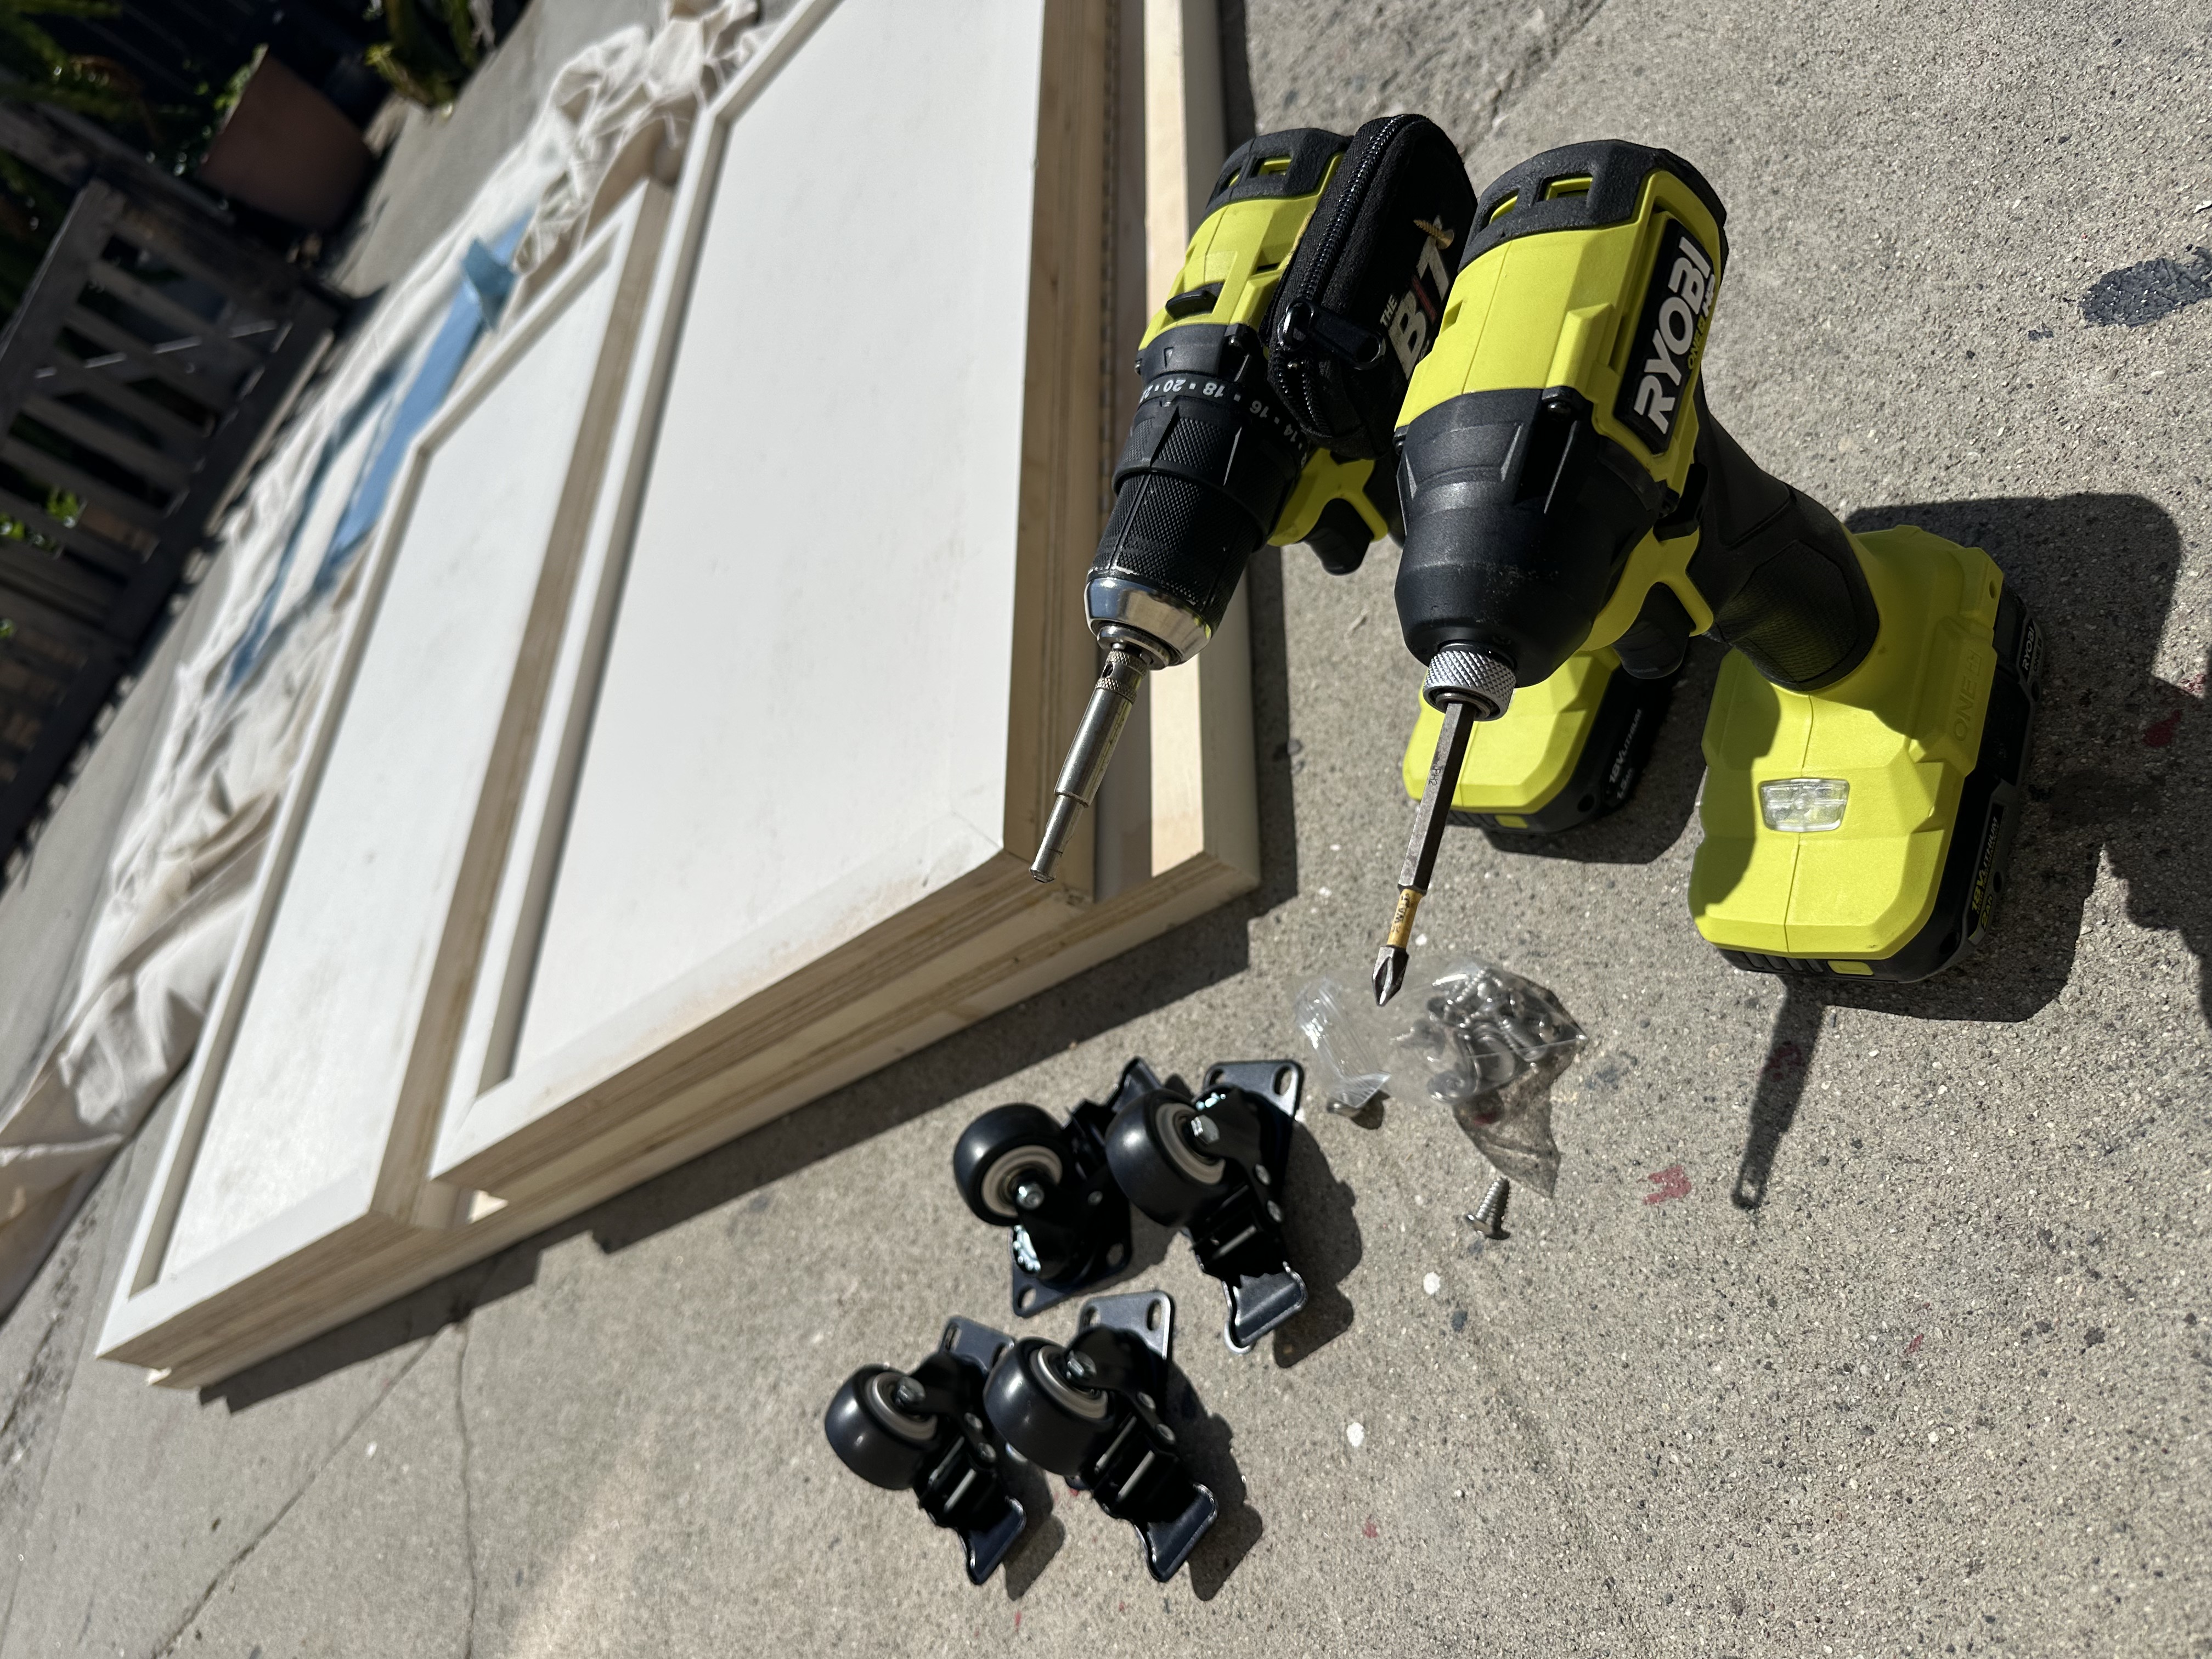
Since portability was one of the main goals, I added piano hinges so the bar could collapse.
Once that was done, I laid down three coats of white mocha paint, spacing them about 12 hours apart, and finished it off with a water-based polyurethane to protect the surface.
The last thing to do was add heavy duty casters to make this bar easy to move around.
Funny thing is, the actual building only took about a day.
It was the sanding, painting, and finishing that stretched the project into two.
In the past, a build like this would’ve meant multiple trips to Home Depot and a lot of unnecessary frustration.
This time, taking the extra time to plan ahead made all the difference.
The biggest lesson from this one was simple:
An organized workspace and a little patience remove a lot of the barriers between an idea and actually bringing it to life.
I didn’t make this for anyone in particular. I just wanted to see if I could pull it off and honestly, I’m pretty happy with how it turned out.
Here is a list of materials and tools I used! Most of these things I either had laying around or I got from Home Depot.
I highly recommend always getting your hardware from Amazon to save a ton of $$$
Materials
- ¾” plywood (2 full sheets)
- ¼” plywood (for design panels)
- Piano hinges (Ace Hardware)
- Heavy-duty locking casters (Amazon)
- Wood screws
- White mocha paint
- Water-based polyurethane
Tools
- Circular saw
- Drill
- Sander
- Measuring tape
- Speed square